
About iBANK Masternode
What are Masternodes?
Masternodes are increasingly becoming a more and more popular source of earning returns within the blockchain ecosystem. Masternodes are validator nodes that provide the blockchain Read More

We use cookies to ensure you get the best experience on our website.


Masternodes are increasingly becoming a more and more popular source of earning returns within the blockchain ecosystem. Masternodes are validator nodes that provide the blockchain Read More
This tutorial will guide you in detail through the steps necessary to setup a INVESTBANKS masternode on Ubuntu 18.04 64-bit remote server (VPS) that is controlled via your local Control wallet. Your local wallet is not required to be kept open and you can store it as a cold wallet whilst still collecting masternode payments. There are other ways to setup masternode, but this one is highly recommended as it’s one of the most secure ways.
(NOTE: You will need a different IP address for each masternode you plan to host.)
Download the most recent version of the INVESTBANKS Core wallet here: IBANK Wallet
Choose the proper version for your operating system. Extract it, install and run the wallet. After starting the wallet for the first time, it will offer you to make a default INVESTBANKS data directory. Depending on your operating system, the default directory should be similar to:
C:\Users\YourUsername\AppData\Roaming\INVESTBANKS
The above example of default directory is Windows based, for other operating systems, check HERE
If you choose your own location ensure that you record where that is.
This is entirely OPTIONAL step. It is always recommended not to trust, but to verify the blockchain yourself. However, since this would take longer than downloading the latest blockchain snapshot, there is a way to speed up the synchronization by downloading the latest snapshot. It can be downloaded from: IBANK Blockchain Tutorial how to use it is also there.
First of all, make sure that you have 1000 IBANK in your wallet (in fact, 1000,001 IBANK to make sure you are able to cover the transaction fees).


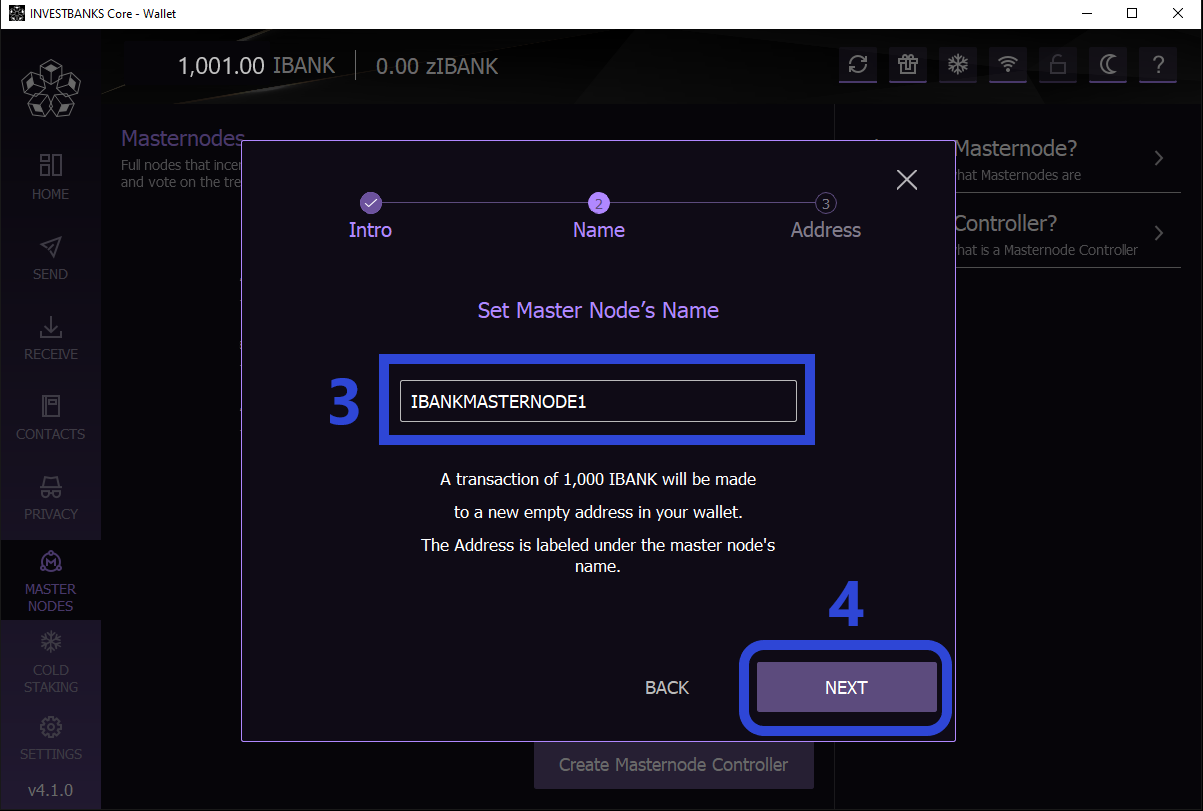
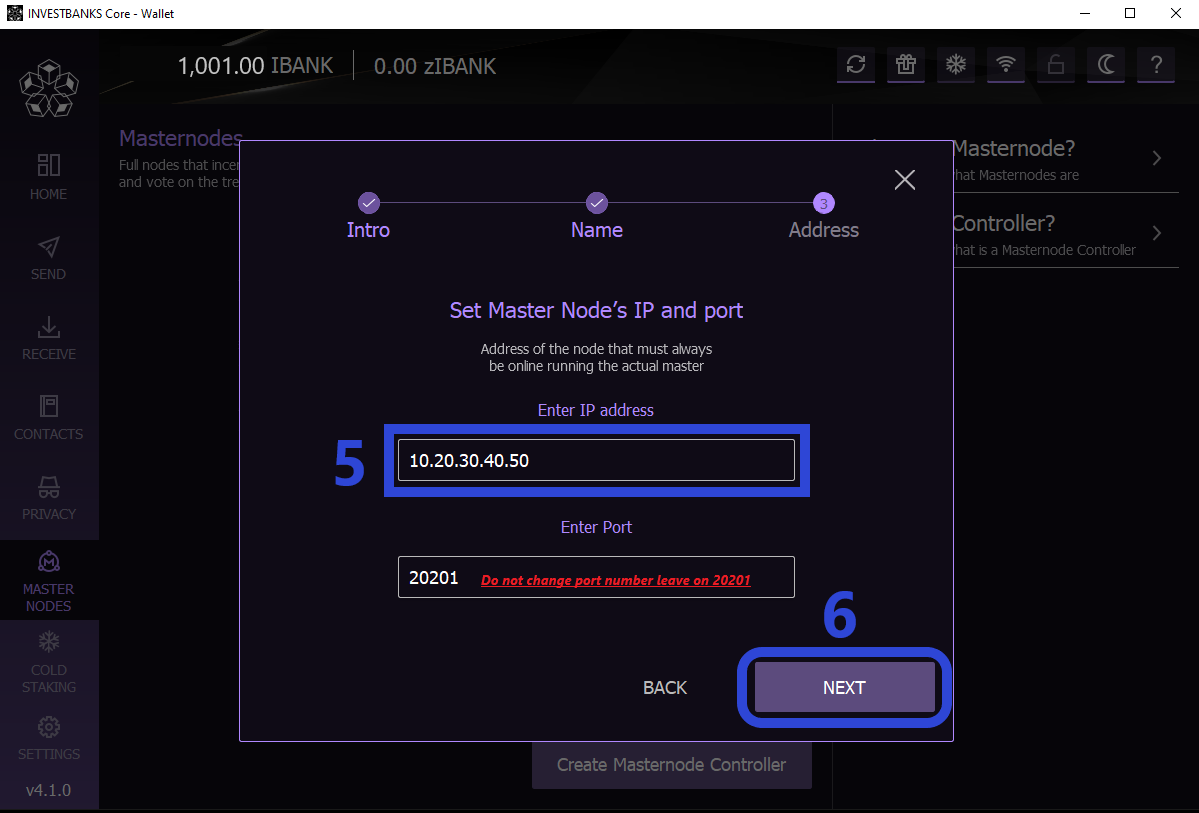
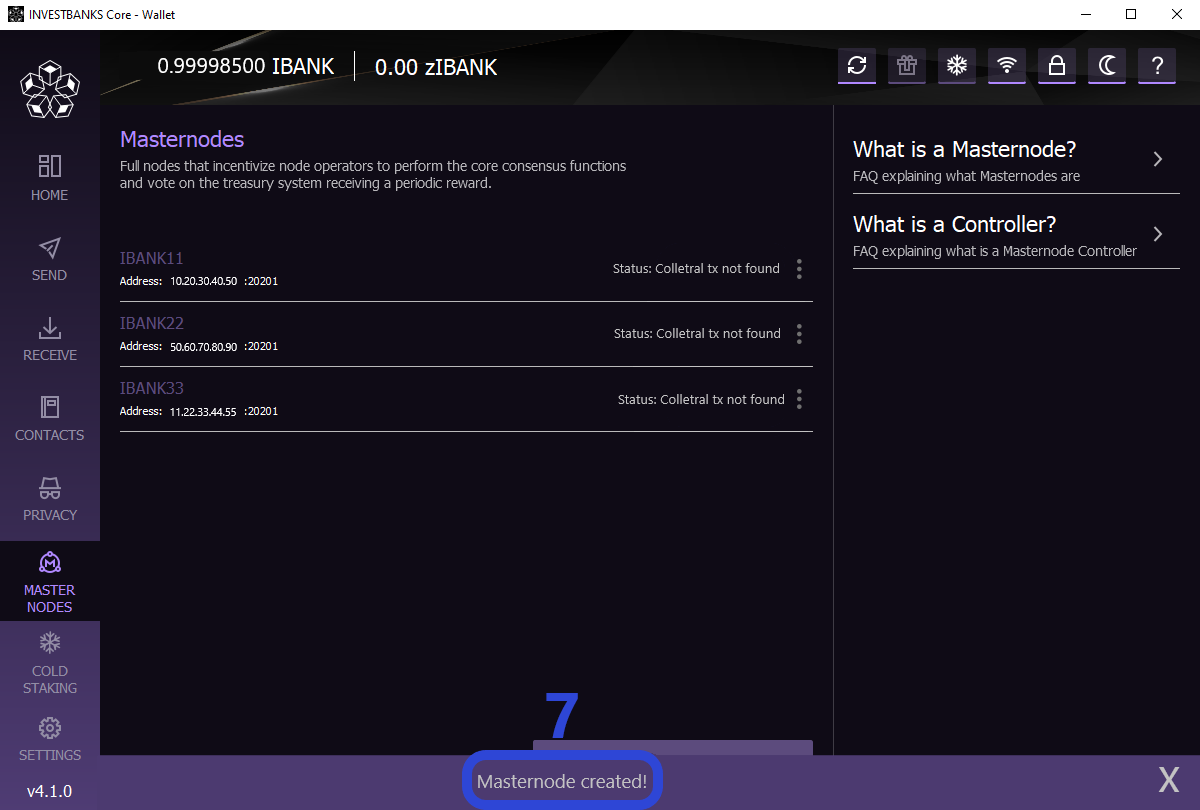
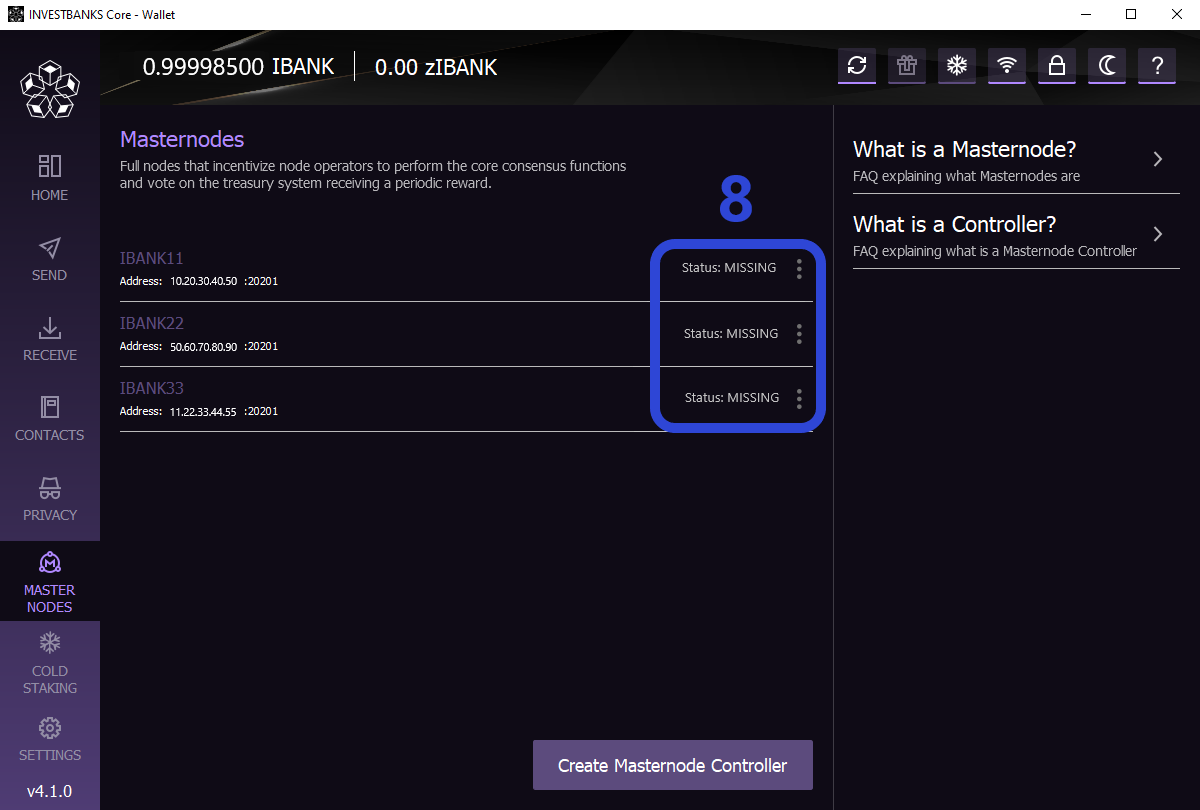
We will get back here to Control wallet little bit later after we setup the VPS.
These procedures are for a clean server install. If you have an existing installation then some steps may not be required. Performing the steps is unlikely to have any effect on the system. Securing the server has NOT been included in this tutorial. That is your responsibility. Although it’s not required, a great guide can be found HERE to assist you.
To be able to access a VPS, you need a software/SSH client like PuTTY for example. You can choose between alternatives as well, but this tutorial will not include installation of such software. After you successfully login to your VPS, follow the further steps.
A clean server install will likely need some software updates. Enter the following command which will bring the system up to date:
sudo apt-get update && sudo apt-get -y upgrade
Enter the following command lines one by one to download and extract INVESTBANKS wallet:
cd ~ && wget https://investbanks.com/downloads/app/Linux_v4.1.0.zip
unzip Linux_v4.1.0.zip && sudo rm -f Linux_v4.1.0.zip
Before the node can operate as a masternode a custom configuration file needs to be created. Since we have not loaded the wallet yet, we will create the necessary directories and the configuration file by typing the following command lines one by one:
mkdir ~/.investbanks && cd ~/.investbanks && sudo apt-get install nano && touch investbanks.conf && nano investbanks.conf
This command has created a blank INVESTBANKS configuration file where we will enter our masternode configuration variables. Now we should properly setup configuration settings.
Paste the following configuration settings into the editor (using PuTTY, paste is being done simply by right mouse click):
rpcuser=<YOUR_OWN_RPC_USERNAME>
Rpcpassword=<YOUR_OWN_RPC_PASSWORD>
rpcallowip=127.0.0.1
server=1
daemon=1
logtimestamps=1
maxconnections=256
Before you exit the editor, there are 3 parameters that you need to update with your own settings. These are:
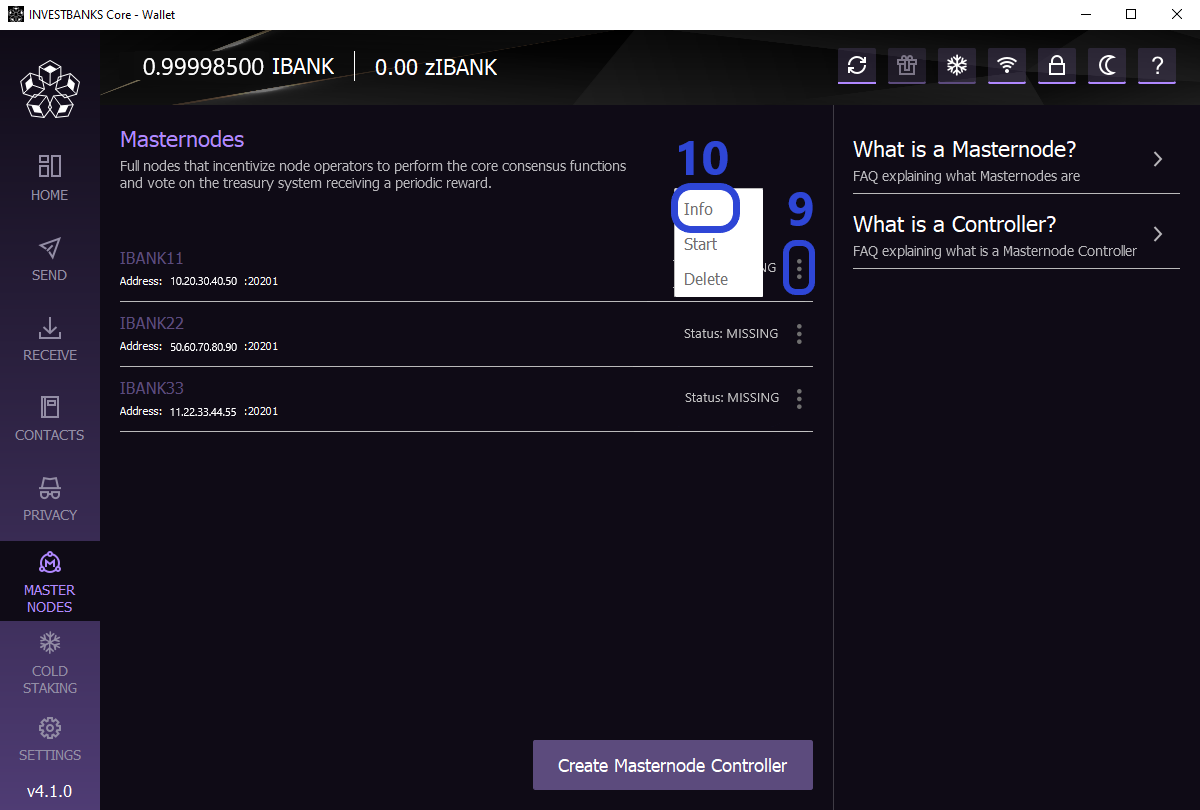
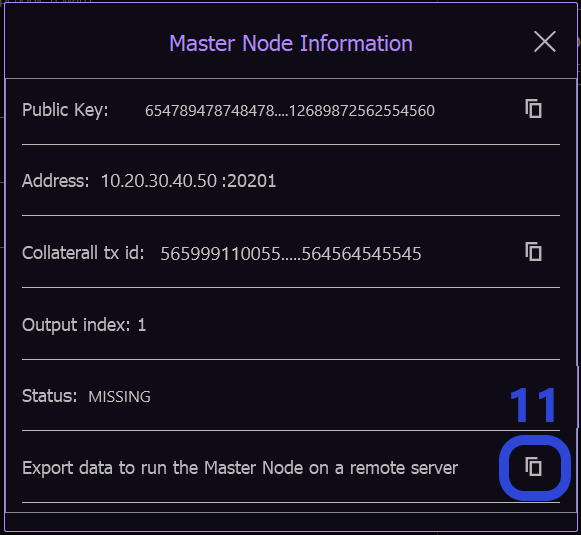
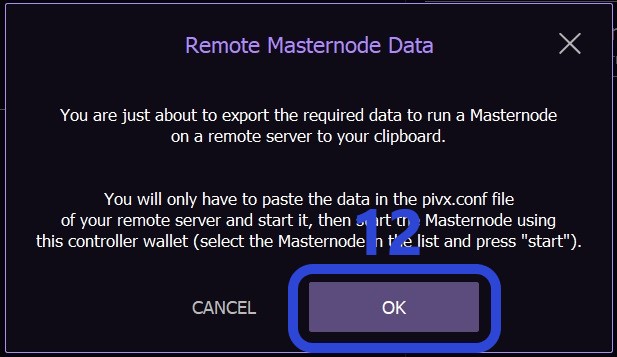
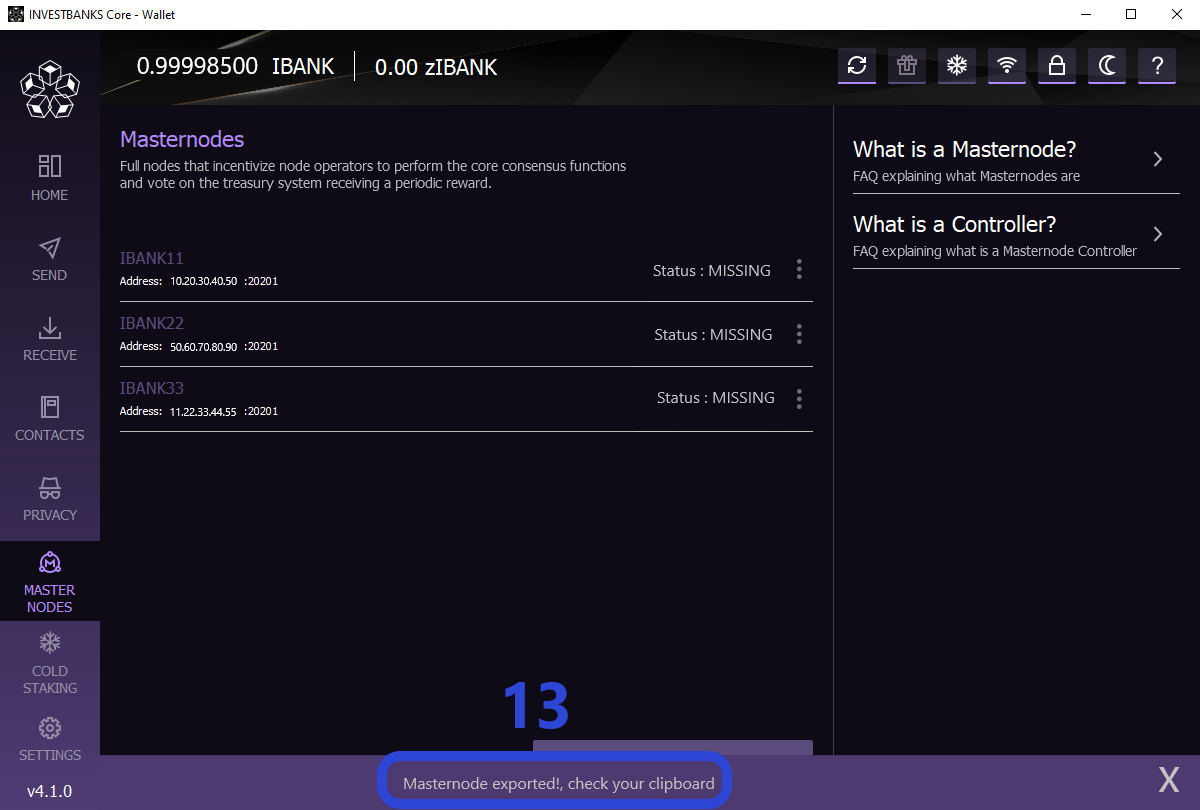

With the configuration created we are now ready to load the masternode and sync to the network. Load the masternode by typing the following command:
cd ~/investbanks/bin && ./investbanksd
You will get the message “INVESTBANKS server starting”. To follow the progress until the wallet is fully loaded and synchronized, type:
tail -f ~/.investbanks/debug.log
Wait until you see the message similar to:
2020-01-10 13:31:01 CMasternodeSync::GetNextAsset – Sync has finished
2020-01-10 13:31:01 CActiveMasternode::ManageStatus() – not capable: Hot node, waiting for remote activation.
Once you get this message, you are completely synced and masternode is ready to be started. Press CTRL-C to get back to command line
./investbanks-cli getbestblockhash
You will get back hash that will look like:
1ab2a12a1a1a121a1212ab1aba121212121ab1a1a12a12121aba1a1abab1212aa1
Paste the number you get after./investbanks-cli reconsiderblock command like this:
./investbanks-cli reconsiderblock 1ab2a12a1a1a121a1212ab1aba121212121ab1a1a12a12121aba1a1abab1212aa1
Finally, type:
./investbanks-cli clearbanned
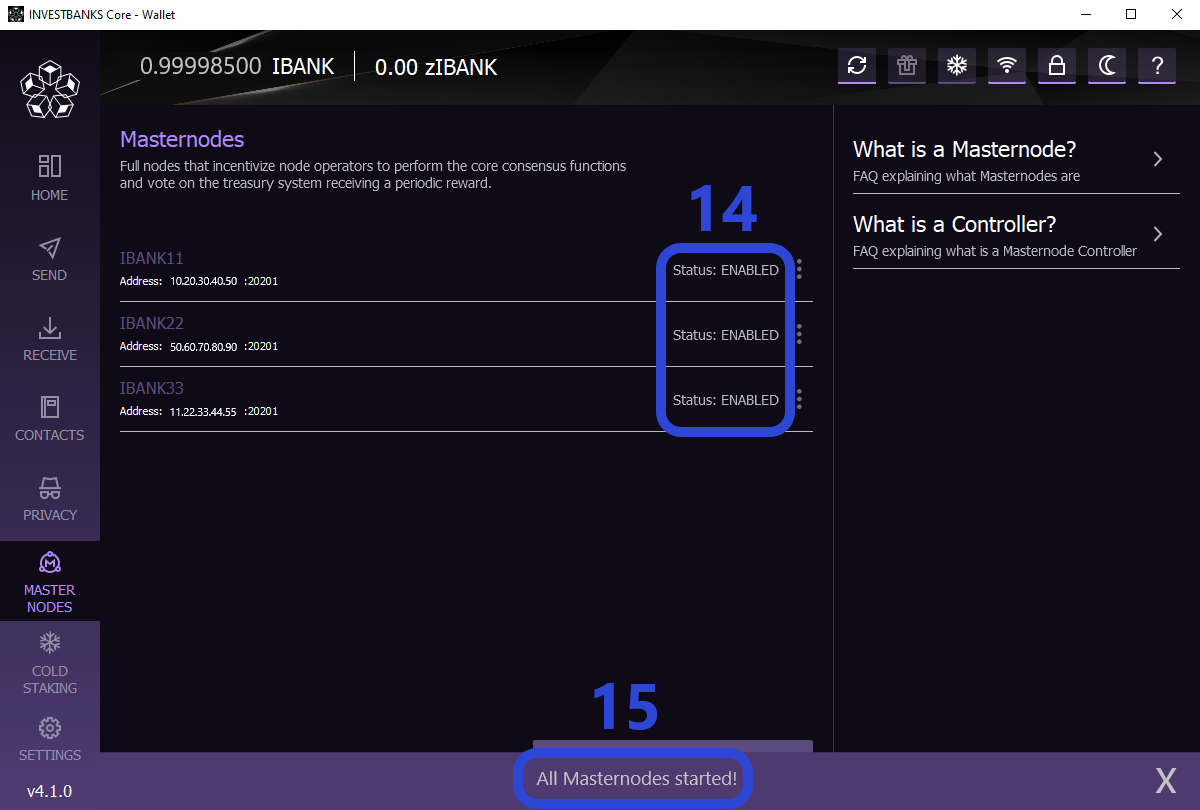
Now go back to your Control wallet -> Masternodes -> Click “Start Inactive/s”
Status will change from MISSING -> ACTIVE.
Now go back to your VPS and type:
./investbanks-cli startmasternode local false
If everything went well, you should receive the following message:
“Masternode successfully started”